I made this cake around the time Dorie Greenspan's "Around the French Table" came out, a book that has not once disappointed me. A book you must purchase if you haven't already. I've written about Dorie Greenspan several times already and there's good reason for that.
Friday, October 14, 2011
Marie-Helene's apple cake
I made this cake around the time Dorie Greenspan's "Around the French Table" came out, a book that has not once disappointed me. A book you must purchase if you haven't already. I've written about Dorie Greenspan several times already and there's good reason for that.
Thursday, October 6, 2011
Dark chocolate and hazelnut mousse
Instead, I'm going to alleviate some of my guilt by cleaning out my virtual drawers. I'm getting around to blog posts I've been meaning to get to for a long time. I first made this at a French bistro cooking class more than two years ago but then made it again more recently when I had some francophile friends over for dinner.
Saturday, April 16, 2011
Poilane's Punitions or Punishment Cookies
This recipe comes to us via Dorie Greenspan's book "Paris Sweets." Which I've referenced time and time again. It's adapted from the classic recipe from the world-renowned Parisian bakery Poilane.
Monday, March 21, 2011
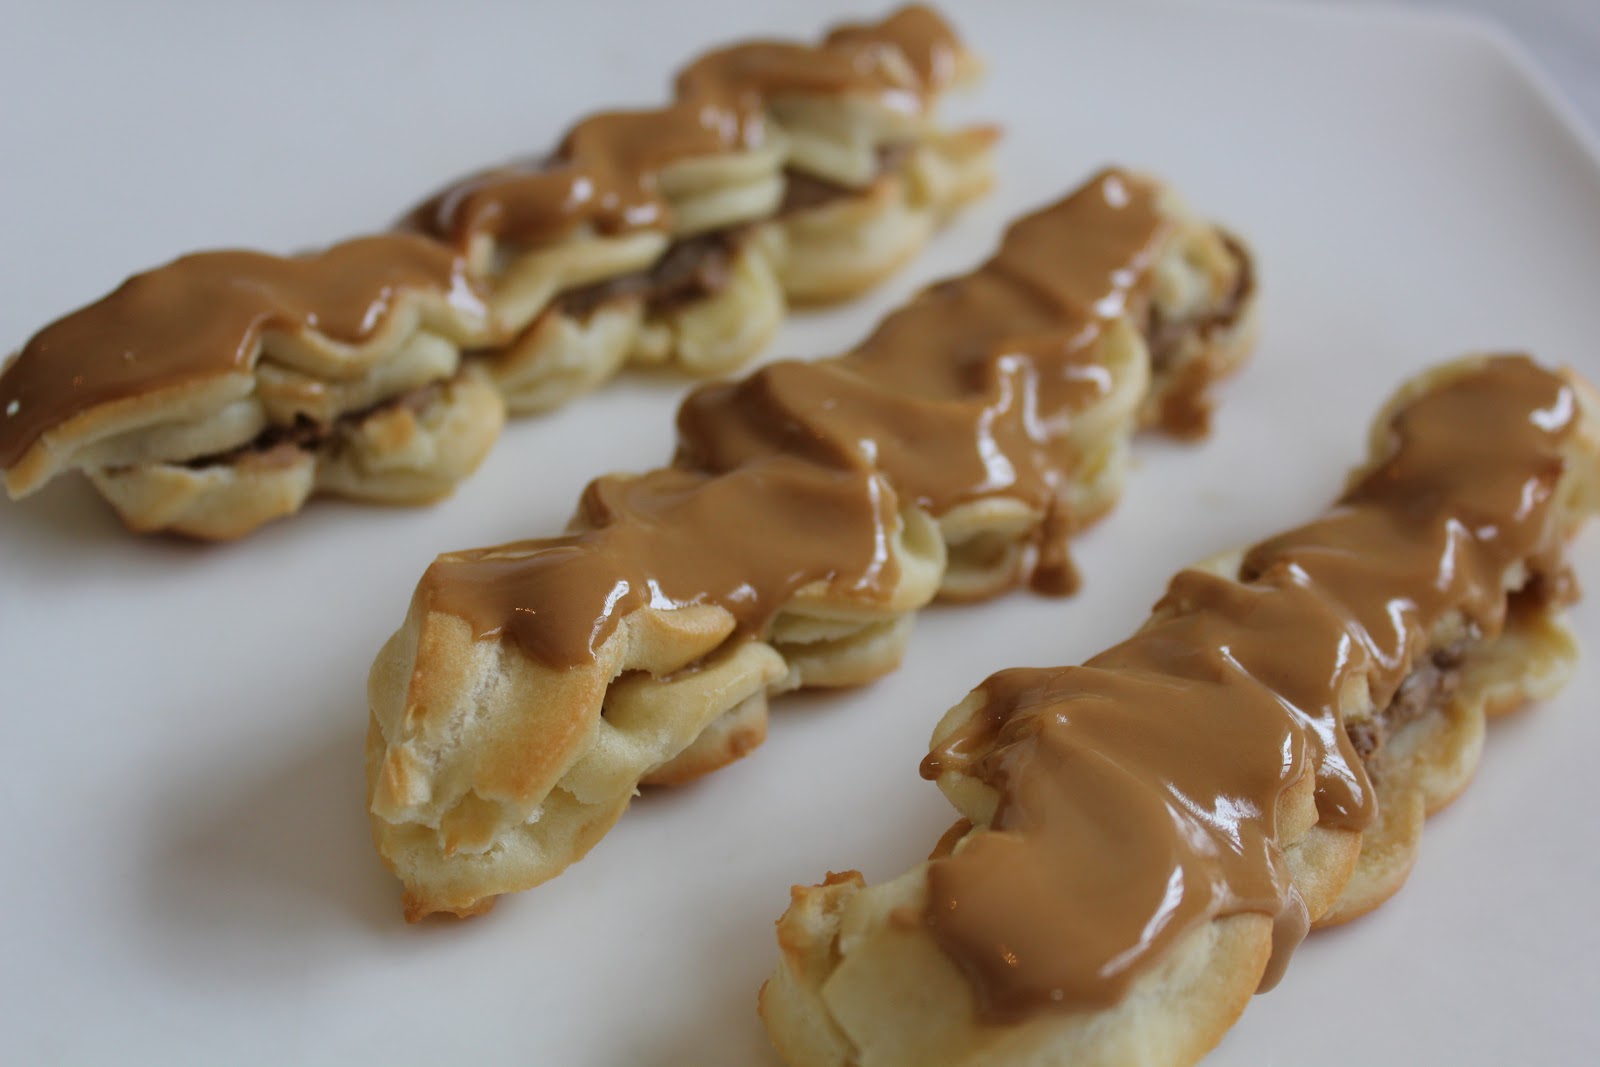
Dorie Greenspan's coffee eclairs
But the real thing, authentic Parisian eclairs, are airy eclairs filled with the lightest of light custard or pastry cream. With eclairs au cafe, both the glaze and pastry cream is accentuated by the inclusion of espresso, introducing just the right amount of sharpness to mellow out the high sugar content.
Monday, December 13, 2010
Chocolate & Zucchini's Canelés
It was love at first bite. Sorry I can't resist a cheesy play on words. Back to the batter at hand (tee hee).
I first made canelés, if you might remember, at Bonnie Gordon's School of Confectionary Arts. I signed up for the two-day course mainly to learn how to make macarons.
And I did, and they were delicious, and I had rave reviews. But. As soon as I had learned how to make the macarons, all I could think about was how delicious these unassuming canelés are.
Sure enough, they are near-impossible to find in Toronto (only at Nadege Patisserie I believe - that's Nah-dej, not Nah-deh-jeh). So I had been craving them ever since.
Wednesday, October 27, 2010
Hazelnut-almond financiers redux
In fact, they are hard to find and I bought my silicone financiers molds at eBay from a purveyor in New York City. And after many, many, many months I used them.
Saturday, October 23, 2010
Dorie Greenspan's Nutella Tartine
This may seem ridiculous to Canadians, and Americans, but it's not unusual in Europe where Nutella is as popular as peanut butter is here. Even in the Netherlands, my good friend Elsbeth served me chocolate shavings on toast for breakfast when I stayed with her in Utrecht. This recipe is French pastry chef Pierre Hermé's interpretation of the after-school treat (you may know him as the master of macarons).
Wednesday, October 20, 2010
Barefoot Contessa's brioche loaves
I made this recipe out of laziness. I couldn't find any brioche or challah to buy for one of Dorie Greenspan's tartine recipes in either of my local grocery stores and I didn't feel like driving to my favourite French bakery to buy any. So, I made some myself.
Once again, Ina Garten’s "Barefoot in Paris" book came through with a fail-proof recipe. It sounds like a lot of trouble to make, but it's nearly effortless. If you're not familiar with brioche, it is a French bread verging on a sweet with a high egg and butter content that translates into a tender crumb and a dark, golden, flaky crust.
It's ideal to use when making French toast, bread pudding, or even to toast and spread with a thin layer of butter. I used to wonder what all the fuss was about when my mother would fall into raptures over brioche.
Even my son opened his mouth wide, proclaiming "mahm!" when I took too long between morsels of brioche. But I always preferred the more populist croissant. After making my own brioche, however, I'm not sure I can ever go back to eating any old sliced bread. This may become a weekly tradition in our household.
Friday, July 30, 2010
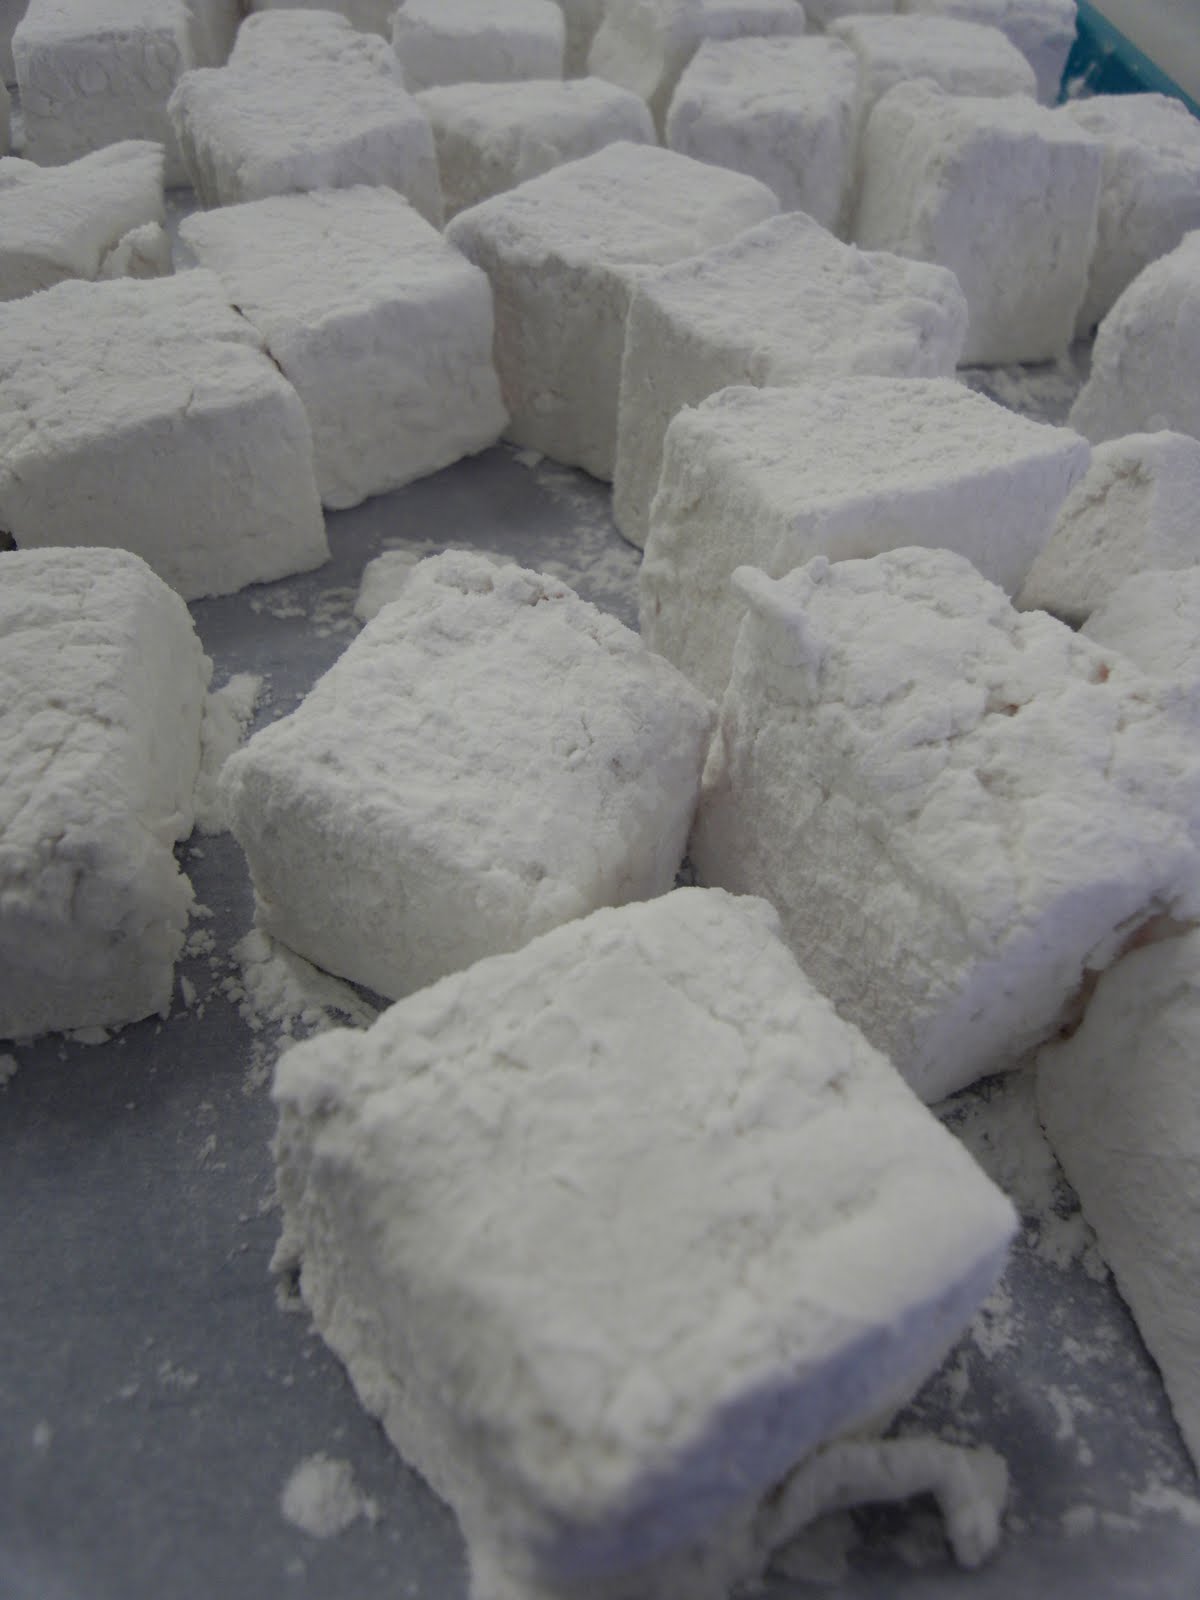
French pastries day 2: Guimauves and madeleines
But in the middle of our demo on guimauves, I realized what I dismissed as a mere headache was quickly becoming a migraine, an ailment I had avoided since becoming pregnant and having my baby.
Monday, July 19, 2010
French pastries course day 1: Macarons and canelés
So when Toronto's Bonnie Gordon's School of Confectionary Arts offered a two-day French pastries course teaching how to make macarons, among other things, I leapt at the opportunity. Well, maybe that's an exaggeration, I cleared it with my husband and mother to see if they could cover watching my son for the two days before registering. And then I leapt.
Wednesday, June 30, 2010
Julia Child's Cherry Clafouti
It wasn't until recently, when I found myself purchasing in-season cherries every weekend, that I cast my mind back to that memory. At the time, in my early twenties, clafouti seemed overly plain and not worth my efforts. And I can't say I fully appreciated the flavours. Flavours, you ask? Plural?
Isn't it just a bunch of baked cherries in a crepe-like batter? Well, not exactly. Clafouti hails from the Limousin region of France and is traditionally made with cherries, but you will find several variations including plums, prunes, and apples. The version we sampled in class that day included lemon zest, lemon oil and mulled cherries.
Wednesday, May 26, 2010
Julia Child's Reine de Saba
After a pregnancy-long drought of chocolate, I am getting back on the cocoa bandwagon.
I know, I know, I have been neglecting my blog readers. The truth is that over the past six weeks, our household has grappled with my infant cutting three teeth, getting over a feverish virus, three ear infections, and countless sleepless nights. I've lost a bit of my joie de vivre, it's true.
So you will forgive me for not being in the mood to bake.
I made this cake on Mother's Day for dessert following a late luncheon with my mother and mother-in-law. It was probably not the best choice for that morning, as my son was cranky (we would later find out he had an ear infection), and this took longer than I would have liked.
Sunday, March 21, 2010
SoNo's classic chocolate mousse
Like this recipe for classic chocolate mousse that comes from "The SoNo Baking Company Cookbook," which I've already reviewed. (Follow these links for my posts on SoNo's raspberry chocolate chip rugelach, and coconut chocolate chip bars).
It wasn't overly sweet, as promised, because of the bittersweet chocolate. But it lacked the depth of flavour of the chocolate mousse I've tasted in France, even after I added the pure vanilla extract that was not listed in the ingredients (which included finely chopped bittersweet chocolate, eggs, sugar, pinch of coarse salt, and heavy cream).
Substitutions: No substitutions, but I added vanilla extract while whipping the mousse as I felt like it needed some extra oomph. In the future, I may add some liqueur or try semisweet chocolate instead.
Would I make this again? Yes, because I whipped it up in mere minutes while tap dancing to Lykke Li songs to keep my baby entertained in his high chair. Also yes because I left the individual portions of the mousse in my fridge for a couple of days and it tasted even better when I pulled it out then.
Grade: Four-and-a-half stars out of five. It may have gotten a perfect score if there were greater depth of flavour, but it scored high marks for being easy to make.
Monday, February 1, 2010
Merveilleux macarons
A few years ago my husband and I were shopping on the fashionable rue Saint-Honoré, an ancient street in the 1st arrondissement of Paris, known for its high-end boutiques, cafes, and hotels, when the skies opened and a veritable ocean of water poured down. It was a bit of a disappointment as we had planned to spend a leisurely morning window-shopping, or faire du lèche-vitrine (literally translated from French to mean window-licking).It was my fourth trip to Paris, my favourite city in the whole world, and as soon as I got there I was jumping out of my skin with excitement. I wanted to cram every second of the day with shopping, eating, wandering, something - anything!
Rather than let the rain dampen my spirits or grab a cab back to the hotel, I grabbed my dripping husband and we ducked into a chocolatier - pâtissier's shop where I purchased a few truffles and one, single, perfect macaron. I ate it standing, and soaking, on the street corner in Paris. It is one of my favourite memories of that trip, perhaps even beating the time I got drunk on beer in our Christian Lacroix-designed hotel room and sang "Caramels, Bonbons et Chocolats" while looking out onto the street in the Marais district.
Let's be clear here, a macaron is NOT a coconut macaroon. It is a French confectionery made of almond flour, egg whites and sugar; and it's delicate, shell-like crust yields to a moist interior. In the first bite, it manages to be enchanting, remarkable, and unexpected all at once. It is also extraordinarily difficult to make and relatively expensive. One macaron will set you back anywhere from $2 to $5 and up, depending on where you purchase it, and it is one of my biggest indulgences. I have been known to unabashedly buy a few and hide them in my house.This is not a sweet treat you can chomp on while sitting on your sofa watching "The Bachelor." Small and fluffy as they are, just a couple are enough to fulfill your fix. While macarons have become somewhat of a trendy confection in North America over the past few years, I have sampled several macarons in Toronto and few of them measure up to their French cousins.
But I was lucky enough to stumble upon a Toronto-based company, Bakerbots Baking, while researching designer cakes for my son's baptism. Lo and behold, Rosanne not only made gorgeous cakes but macarons as well - delicious, moist, airy, heavenly macarons. In the photo at the top (courtesy Bakerbots) you can see the tower of 150 pistachio, vanilla bean, coconut with lime, and caramel fleur de sel macarons that she created for Baby A's baptism this past weekend. My guests seemed as thrilled as I was to sample something new and I was happy to share one of my favourite indulgences with them. I know what you're thinking. What about the cake? More on that to come in another post.
It was stunning.
Tuesday, July 21, 2009
Pear and chocolate cake-tart
Dusoulier, the blogger behind Chocolate & Zucchini, a delectable compendium of recipes and anecdotes has never steered me wrong before.
Be it the chocolate-dipped hazelnut marbles; tarte tomate a la tatin or pistachio and chorizo cake; or the mini-financiers au miel, I often refer to this French foodie's cookbook for some inspiration.
Sunday, July 12, 2009
Picture-perfect palmiers
I used the recipe from "The Art and Soul of Baking" for the first of three batches, but when I pulled the palmiers from the oven, they were too pale in colour, too thick and the flavour of the caramelized sugar had not infused the cookies. I was partly to blame of course as I hadn't quite figured out the timing of the oven yet and I was overly afraid to burn these.
So I adapted the recipe using the picture-by-picture instructions from Joy the Baker's baking blog for the next two batches. Sure enough, while the first batch was too pale and thick, the second was too dark and burnt, and the third was just right. Below you will find a simplified version of how to make palmiers based on my own error and trial. I hope your palmiers will turn out just right, too.
Makes about four dozen palmiers.
Ingredients:
One box puff pastry (two rolls inside)
2 cups sugar
Spices such as nutmeg, cinnamon, ginger, ground cardamom should you wish to spice up your palmiers
Line two baking sheets with parchment paper or silicone baking mats. Preheat the oven to 375 degrees Fahrenheit and place the oven rack in the centre.
Using about half a cup of sugar, dust your work surface. Place one roll of puff pastry atop the sugar. Make sure it is thawed, but cool to the touch.
Roll out the puff pastry until it is about 12 by 10 inches. Sprinkle more sugar all over the surface, until it is covered. When I made the cinnamon palmiers, this was the point at which I sprinkled the cinnamon atop the sugar.
Using a sharp knife, carefully mark a line dividing the dough in half vertically. Make sure you do not actually cut through the line.
Starting at one end, begin rolling from the outside toward the centre seam. Make it as tight as you possibly can. Now do the other side. Gently press the two sides together. Wrap in plastic wrap and refrigerate for at least half an hour to an hour, until the roll is cold and firm.
Remove the cylinder from the fridge (one at a time, so that the other cylinder does not thaw while you are preparing your first batch) and then cut 1/4-inch thick slices from the chilled cylinder. Dip each side in the leftover sugar, being careful not to let the slices unravel, and place them two inches apart on a lined baking sheet.
Bake the cookies for about 7 to 10 minutes, or until the edges are golden. Do NOT pull them out before you see the edges browning. Using a spatula (or your fingers, like I did), turn them over and return the sheet back to the oven, baking another 9 to 12 minutes, until they are a beautiful caramelized golden brown. Keep a close eye on the palmiers as they can burn easily.
Now repeat with the other roll from the puff pastry box.
Substitutions:
I can say that I took tips and ideas from several palmiers recipes until I came up with one that worked for my oven and my tastebuds. The key thing is that this recipe is so easy that you should feel free to experiment. I used cinnamon, but you can also make savoury palmiers with Parmesan cheese and smoked paprika, or fresh basil, garlic, and olive oil, or how about using vanilla sugar rather than regular granulated sugar?
Would I make this again?
I shouldn't be admitting this, but every time I passed the plate of cookies, I ate one. They are that addictive. If you prefer to make a smaller batch of cookies in one go, you can also freeze the dough, double-wrap it and place in a freezer bag for up to six weeks. Before using the frozen dough, thaw it on the counter for about 15 minutes until it is still cold but soft enough to slice safely.
Grade:
Eighteen stars out of five. No, really. I loved these buttery, flaky cookies and will make them a staple at my house. And at about $4-5 for ingredients that yielded more than four dozen delightfully delicious cookies, there is nothing to complain about.
Tuesday, June 16, 2009
South of France-inspired brunch
It's been nearly ten years since I stepped foot in the south of France, but the tastes still linger in my culinary memory: aromatic olives, sun-kissed red tomatoes bursting with juice, the hint of lavender in Herbes de Provence.
As much as I'd love to hop on a place to take a stroll on the Promenade des Anglais in Nice right now, this bun in the oven is keeping my feet on the ground for now, so what better way to honour the foods of France than to recreate some of those flavours in my own kitchen?
I served the following menu at a brunch for some friends:
Mini croque-monsieur, otherwise known as "a fancy French ham and cheese sandwich" as one friend put it, topped with a bechamel sauce and melting Gruyere. Recipe adapted from Ina Garten
An array of croissants and Bonne Maman jams
Manchego, Oka, and Cantenaar cheeses
Heirloom tomato carpaccio, which involved slicing these tomatoes very thin, drizzling them with organic balsamic vinegar, olive oil, freshly ground pepper, and citrus sea salt, and adding basil and toasted pine nuts (click on the first photo in this post to get a closer look - the variety of colours is astounding
Saturday, January 17, 2009
French bistro cooking class
A friend of mine wanted to take a cooking class and I recommended Dish Cooking Studio to her, where I'd enjoyed taking two classes on previous occasions: "brunch entertaining", and "Simply French."
I've successfully adapted recipes, and skills, that I learned from these classes to my everyday life, and so it was with great anticipation that we signed up for the French bistro cooking class.
A little bit of history here: The term "bistro" comes from the Russian word "quick." According to an urban legend, during the Russian occupation of Paris in 1915, Russian soldiers who wanted quick service would demand "bistro." Mussels in tomato Pernod cream sauce
The French bistro menu of the evening:
Sweet onion and Gruyere soup, a lighter adaption of the classic French onion soup
Beautifully marbled onglet steak from Cumbrae's, with Bearnaise sauce
Bistro frites
Dark chocolate and hazelnut mousse with berry coulis Unlike the other two classes I took in previous years, however, this one was hands-on. The chef showed the class a short demonstration of the items we would prepare, before my friend and I were tasked with taking on the mussels, from cleaning the beards off the mussels to preparing the aromatic tomato-based Pernod sauce and plating it for our fellow students.
Within minutes, the kitchen was buzzing with the hisssssing searing of the steaks in cast-iron pans, the whirring of the blender as it ground the hazelnuts, and the chop, chop, chop as the Yukon potatoes made their transformation into double-fried pommes frites.
The recipe for the mussels will follow, along with some key tips I gleaned from our chef, Charmaine Baan.
Ingredients:
Serves four
1/2 cup white wine
1/2 cup Pernod (or leave it out and include more wine)
1 cup diced tomatoes (fresh or tinned in the winter)
1/2 cup 35 per cent cream (don't substitute a lower fat content, so it won't curdle)
2-3 lb cleaned fresh mussels
1 large shallot - sliced
3 springs tarragon
5- springs chervil
salt and freshly cracked black pepper
Directions:
1. Wash mussels very well under cold running water to remove any sand and grit. If any are slightly open, tap them to see if they will close. If they do, keep them. If they remain open, or cracked, throw them out. Check them to make sure they feel slightly heavy for their size. Good mussels should smell like the sea, not fishy.
2. Wash the herbs and dry them well. Remove the leaves from the stems and chop them coarsely, set aside.
3. Place the wine and shallot in a large pot, making sure it's big enough for the mussels to expand in there. Season with salt and pepper and bring to a boil. Add tomatoes and cream. Let simmer for a few minutes or until slightly reduced and thicker. Add Pernod and bring the mixture to a light boil.
4. Add the cleaned mussels to the pot and cover tightly. Don't let yourself peek before 3-5 minutes. If they are about 75 per cent of the way there, stir them once and cover the pot again. They should all be fully open. Remove with a slotted spoon, place in a dish.
5. Add half of the chopped herbs, season with salt and pepper, then top with the remaining herbs, pour over mussels and serve immediately.
Would I make this again?The process was indeed so simple, providing you remember to "goutez, goutez, goutez" all the way through that I can't way to impress some guests with this. The key is to have patience when you are cleaning the grit and beards off the mussels. This could take more time than you are used to.
Substitutions:While I hate the smell and taste of Pernod for the most part, it has a way of mellowing out and adding depth to the flavours of this sauce. If you're still not wowed by the smell, or don't have any on hand, feel free to increase the wine content. You can also substitute onions for the shallots, but the end result won't be quite as refined and subtle. Grade:Five stars out of five. Ever since my parents treated me to a trip to Belgium, and the Netherlands, for my 16th birthday, moules et frites ranks among my favourite meals. But it has to be done right. And what better way to control the result than to make it yourself?
Overall, I enjoyed the class tremendously. However, I am a visual learner and perhaps the demo classes that I took before are more suited to someone like me. The chefs take more time to explain the recipes as they are making them, whereas in this case, we learned how to make one recipe well by doing it ourselves. Still, there are no real complaints from this amateur chef, especially after eating this gourmet meal with other happy-as-a-clam (mussel?) foodies who can appreciate the hard work that goes into a big batch of frites.
Monday, December 1, 2008
Chocolate and Zucchini's chocolate-dipped hazelnut marbles
To find some inspiration for my after-dinner sweets, I turned to the chapter entitled Mignardises, French for the "sweet bites" that you get with your coffee at a high-end restaurant. Clotilde says in her blog that the word comes from mignard, "an old-fashioned word which, as a noun, means a small child, and as an adjective means delicate, graceful and pretty."
I happened to have all the necessary ingredients to make the Chocolate-Dipped Hazelnut Marbles, or Billes de Noisettes au Chocolat in French, so I happily set forth.
The end result was these elegant bites of hazelnut heaven that like miniature candied apples and taste like the Ferrero Rocher. The list of ingredients is short and to the point: 1 cup of shelled hazelnuts, 3/4 cup of confectioners' sugar; fine sea salt; 2 teaspoons honey; and 3 ounces of good-quality bittersweet chocolate.
Directions:
In short, you husk the toasted hazelnuts and pulse them with the sugar and salt in a food processor. Then you add the honey with a tablespoon of hot water, and stir the mixture. After leaving the bowl in the refrigerator, you shape the paste into marble-sized balls and plant toothpicks in each one.
After melting the chocolate, and this is the tricky part, you dip the marbles in the chocolate. Rather than try to twirl the marble in the melted chocolate, use a small spatula to spread the chocolate around the hazelnut paste.
Leave the top uncoated so that the paste peeks through. Let the excess chocolate drip off and then let rest somewhere for a couple of hours in a cool place.
My substitutions: I used dark chocolate rather than bittersweet chocolate. Also, despite the directions, I grew impatient and threw the tray in the fridge, despite the recipe warning against this tactic. I wish I had Clotilde's foresight because my husband opened the fridge door and the whole tray went tumbling down. Luckily for me, and him, I had tried them before they had set completely. The recipe also suggests making the marbles with almonds or pecans.
Grade: Four stars out of five. While I will make these chic mignardises again, happily, they were tricky to make and time-consuming too. Set a couple of leisurely hours aside to make these from start to finish, turn on the Carla Bruni tunes and have a glass of wine. Otherwise you'll be sweating when you're in a rush to shape these tiny marbles and dip them carefully in the chocolate. And you might be tempted to, like I did, put them in the refrigerator.
Saturday, November 8, 2008
Coconut madeleines (and lemon-scented ones too)
Marcel Proust forever immortalized the madeleine in his book "Remembrance of Things Past" and it has since penetrated pop culture references in everything from "The Simpsons" to "The Sopranos." Even Starbucks is selling these scallop shell-shaped French cookies at the counter.
That's enough to make even the most ambitious pastry chef cower at the thought of attempting to recreate these delicate mouthfuls.
But it's not as hard as it looks. I bought a no-stick madeleine pan at the Williams-Sonoma and stared at it for a few hours, revelling in its beauty.
I finally worked up the nerve, telling myself that if I was to spend $34 on what was really just a pretentious cookie pan, I should get something out of it.
Here's the recipe I used for coconut madeleines from the glorious, fantastic, indulgent cookbook "Sticky, Chewy, Messy, Gooey: Desserts for the Serious Sweet Tooth" by Jill O'Connor.
Ingredients:
2 large eggs
2 large egg whites
1/3 cup granulated sugar
1 teaspoon pure vanilla extract
1 cup unbleached all-purpose flour
1 cup confectioners' sugar, sifted
pinch of salt
3/4 cup of unsalted butter, melted and cooled
3/4 cup sweetened, shredded coconut
Directions (Abbreviated by me):
In a large bowl, gently whisk the eggs, egg whites, granulated sugar, and vanilla until smooth.
Sift flour, sugar, and salt onto piece of waxed paper. Fold into batter. Then fold melted butter and coconut into batter until smooth. Batter will be fairly thin. Cover bowl with plastic wrap and refrigerate for at least 1 hour or up to 24 hours.
Spray molds of madeleine pan with nonstick cooking spray. Fill each shell mold with about 1 tablespoon of batter. Place pan on baking sheet and bake until madeleines are firm and golden brown with small hump, 10 to 12 minutes.
Transfer to wire rack, pop them out with tip of sharp paring knife and let cool. Repeat.
My substitutions:
I used a mini madeleine pan, and it produced about 80 mini madeleines.
I also used unsweetened shredded coconut rather than the sweetened variety as I find it too cloying in some desserts. And, I usually do, I used kosher salt rather than regular table salt, to avoid the taste of iodine. Disclaimer: use of kosher salt is not generally recommended in use of baking, but I took a chance, and it worked out fine.
Other recipes call for use of melted butter than flour rather than nonstick cooking spray, but when you have only one pan, the cooking spray is a much more viable alternative. Cleans much more quickly.
Also, as I quickly found out, the baking time for mini madeleines is much shorter - about 6-8 minutes so watch them carefully.
On another occasion, I split the batter in two, adding coconut in one bowl. In the other bowl, I added a couple of teaspoons of juice and a couple of teaspoons of the zest from an organic lemon (I find it so much more pungent). The lemon-scented madeleines needed a bit more time to cook but they were even more delicate and fluffy than their coconut counterparts. If possible, leave lemon-flavoured batter in refrigerator for longer time as the flavour will have greater chance of permeating the batter if you do so.
I dusted my madeleines with powdered sugar, although this recipe doesn't call for it, and others do.
Would I make this again?
Definitely, and I have, to much delight among my family members and co-workers. It's an elegant sweet treat to dip in your tisane or coffee and lovely to include at a sweet table.
Be warned, don't overfill each mold or it will puff up larger than the mold and the edges will turn brown. The batter should be just less than each mold. The recipe is a bit finicky, and will require some babysitting. This is not one where you can stick it in the oven and go do your laundry.
While these are best served fresh from the oven, I have refrigerated them and microwaved them for mere seconds before serving them the next day.
Grade:
Four stars out of five